
Now that you’re in the midst of kids, you probably see that they love to create things with their hands. Once they learn to put their fingers around a pencil or crayon, you’ll see them scribbling on paper, the floor and sometimes the walls too!! The power of creation is in their hands at this tender age, so it helps them if we can guide them to make some fun things that they can use too. One such creation is a decorative paper plate. What can they create using a paper plate? Here are 51 ideas they and you can explore and have fun too:
Paper plate crafts for 2-year-olds
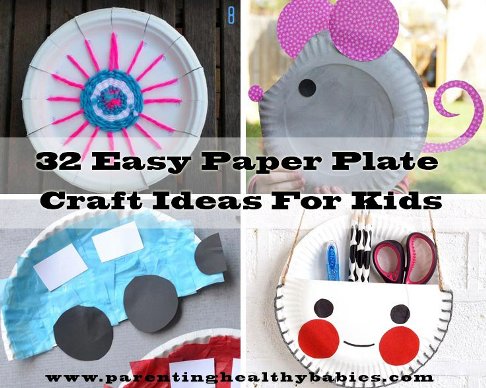
1. Easy Paper Plate Flowers
Your toddler is going to love making this paper plate with flowers. Not only is this a fun project, but your little one can learn to paint, mix colours, recognize shapes and do some gluing too.
How to make paper plate flower craft: Put a paint pallet in front of your child and let him splash colours of his choice onto the paper plate. Once it dries, cut the outer edge of the plate and cut out the inner circle. Now, put aside the centre and trim the edge into large pieces that will serve for flower petals. To put your flower together, take the centre of the flower and ask your child to stick the shorter edge of the petal to the back of centre piece. In this way, he can do the same with the remaining petals and create a flower on his paper plate.
2. Paper Plate Turtle Craft
Children enjoy making this googly eyed green turtle whose body is filled with circles made with a craft punch. When kids use this punch, they actually strengthen their hand muscles.
How to make paper plate turtle craft: You and your child can make this turtle by first painting the paper plate with green paint. Two coats of paint are usually sufficient, if you let the first coat dry before applying the second. Using a craft punch, cut out different sizes of green circles from the cardstock, ensuring that you get a few shades of green. Now, make dots with your craft punch and stick the green circles on to the paper plate to make the back of the turtle.
Print out the turtle’s legs, head and tail on green cardstock and cut them out. Stick them on to the back of the paper plate. Stick his two googly eyes to his head and your turtle is ready.
3. Paper Plate Ladybug Craft
Teach your toddler to use buttons and bottle corks to decorate a paper plate ladybug. Give your child a red and a black pen and show him a picture of a ladybug. Now, let him draw a ladybug on his own.
How to make paper plate ladybug craft: Begin by asking your child to look for black buttons in your button collection. This is not just a fun activity but a good motor one too. Now, pour many shades of red paint into a tray and call out the names of each shade–cherry, cranberry, raspberry, Christmas, scarlet, etc.
Now, ask your child to paint his plate and mix up all the reds nicely. Give him a full paper plate for this activity. Now, make a small black blob of paint on one side of the paper plate for the ladybug’s head. Draw googly eyes and ask your child to paint spots all over the ladybug’s back. Your child can make two ladybugs if he wishes, so that he can stick corks and black paint on one and buttons on the other for different designs. After the paint on the ladybugs’ backs dry, make three holes on each side of each plate and send pipe cleaners for legs down these holes. There, you’ve got two ladybugs ready.
4. Paper Plate Easter Wreath
Introduce your toddler to making tissue paper Easter wreaths. Tissue paper is a very easy material for children to handle and make interesting crafts, so let him make a paper Easter wreath. When kids use this material, they use motor skills to execute the craft. They also like to crumple tissue paper, which actually involves using their hand muscles for crumpling, squeezing and crushing the tissue paper.
How to make paper plate Easter wreath: Cut a wreath shape out of a paper plate. Place a dinner plate to cut the outer circle and your kid’s cereal bowl for the inner circle. Ask him to crush 3×3 squares of tissue paper. Now, glue them all across the wreath. Make a ribbon bow and staple it to the bottom of the plate and a ribbon loop at the top of the wreath to hang it up.
5. Paper Plate Apple Craft
If your child is still very small and is getting familiar with things around him and food, this is a great way of teaching him about fruits he eats like apples.
How to make paper plate apple craft: Take glue and spread it all over the plate. Cut out random pieces of red paper and stick them on the glued plate. Use brown paper to cut out the apple’s stem and green paper to cut out the shape of a leaf. Stick both stem and leaf appropriately. You’ve got your apple craft ready.
6. Paper Bird’s Nest Craft
You can enjoy creating this birds’ nest collage along with your little one. If you have a very young child, entrust him with decorating the paper plate nest and adding eyes and beaks to the baby birds. If your child is a little older, take his help to make life-like birds. Perhaps, you can use real nest material for your collage.
How to make paper plate bird’s nest craft: Turn the plate on its back and paint it brown and leave it to dry. Cut it in half. Next, cut brown paper into strips and stick them on to the plate. To make the nest, cut three oval-shaped coloured paper cards and stick them on the edge of the plate. Now, make a small beak shape and stick it on to the bird’s mouth and two wiggle eyes.
7. Catherine Wheel Craft
Here’s a great paper craft idea for young children and toddlers to do on Bonfire Night.
How to make paper Catherine wheel craft: Splash some paint all over the paper plate. Now, over this choose another colour and do the same. Tilt the plate on one side to make the paint run across the plate and so that the two colours merge to form a unique pattern. Leave it to dry. Meanwhile, cut some lengths of sequins and stick to the rear of the plate. Add some tape to the ends of the sequins lengths to prevent them from falling off. Stick star stickers on the plate and sequins. You can hang the paper wheel craft as a mobile by making a hole in its top part or you can pin it directly on a display board.
8. Chinese Dragon Mask Craft
If you want your child to do something related to the upcoming Chinese New Year, here’s an easy paper craft idea.
How to make paper plate Chinese dragon mask craft: Turn the paper plate on its stomach and paint it. Leave it to dry. Make a hole on either side and push through some elastic to tie it. Cut out two eyeholes. Also, cut some tissue paper in strips and stick them to the chin and cheeks. Now, cut out horns, a nose and spikes using decorative card paper and stick these to your mask.
9. Paper Plate Holiday Hats Craft
These, easily made hats, can be decorated by kids attending a party or used to play games at parties.
How to make paper plate holiday hats craft: The brim on your child’s hat will depend on the large size of the plate and the small size of his head. To make a Shamrock hat, first fold the plate in half and cut out a hole for the little one’s head. With this done, you can proceed to make the shamrock. Now, cut out the shamrock leaf symmetrically, open up the plate and decorate it the way you like. Now, ask your child to add paint and glitter to the hat.
10. Paper Plate Sun Catchers Craft
Here’s a really delightful craft you can enjoy with your child. Children of any age can make this sun catcher with a little help from you.
How to make paper plate sun catchers craft: Give your child a mini paper plate. Using scissors, cut out the middle circle on the paper plate. Give your child some sheets of tissue paper and ask him to cut it into small pieces. Cover the central hole in the paper plate with contact paper and the sticky surface of the contact paper with pieces of tissue paper. Now, cover the tissue paper with a second round of contact paper pieces. Punch a hole in the paper plate and pass yarn through the hole so that the sun catcher can be hung in a window.
11. Paper Plate Monkey Mask Craft
Finally, here’s some fun. A monkey mask for kids–wow!! And to think it’s also easy to make just adds to the fun. Here’s how:
How to make paper plate monkey mask craft: Paint the plate brown and allow it to dry. To make this monkey mask, it’s preferable to use a dinner paper plate and trace it on a cardboard piece like an old cereal box. Now, print the template of a monkey mask, according to your choice. Colour the pieces of the monkey’s face as you like and cut them out. Stick the eyes, ears and mouth on to the paper plate.
12. Paper Plate Goldfish Craft
Younger children will find making this paper plate craft very engaging and a lot of fun. You can choose this craft to make all kinds of coloured fish.
How to make paper plate goldfish craft: From one side of the plate, cut out a ‘V’ shape for the fish’s mouth. Take this V shape and stick it on the opposite side of the plate. Now, you’ve made the fish’s tail. Cut up orange and yellow cellophane into tiny scraps and stick them on to the plate to make up the fish’s scales. Now, all you’re left with is to stick one bead to make up the goldfish’s eye!
13. Paper Plate Countdown Wheel Craft
This craft can be made more fun and colourful if you use all kinds of bits and pieces of crafty items to decorate the wheel. Alternatively, let your child’s imagination run riot by allowing him to paint all the colours he likes on them before you add the numbers.
How to make paper plate countdown wheel craft: Choose the numbers 24-1 from the range of sticky numbers and stick them around the exterior of the plate. Whatever your countdown is to, add that specific message on the plate. For example, “3 days to go to the beach” could be your message that you want to add to the plate. Do it here and now.
Next, cut out an arrow from the card. Attach it to the middle of the plate using a paper fastener. Decorate it with stickers or glitter.
14. Paper Plate Cow Mask Craft
This lovely cow mask can look colourful if you use just the basic craft supplies. Besides, it opens your child’s mind to the umpteen possibilities paper plates and colour pencils provide. So, go for it.
How to make paper plate cow mask craft: Mentally, divide the paper plate into three parts–one central white patch and two black portions on either side. Paint these black portions and leave them to dry. When dry, cut out two eyeholes from these patches. Also, cut out two ears using the black card and two horns from the white card. Stick these to the back of the plate.
Now, use a section of a pink coloured card to make a nose. Draw out the cow’s nostrils and glue this feature on the front of the plate. To make this mask wearable for your child, make a hole on each side of the plate and tie elastic through.
15. Paper Plate Diving Dolphin Craft
Your kids will enjoy seeing their dolphin diving on the waves, up and down; high and low.
How to make paper plate diving dolphin craft: Take two paper plates and paint one dark blue and the other sky blue. Across the dark blue plate, cut out a wave design so that it looks natural. For this, ensure that the middle of the plate makes up a large section of your sea design.
Now, place the dark blue plate on the sky blue plate. With the help of a pencil, push through the middle points of both plates and connect them with a split pin. Using the card, cut out a dolphin and stick it to the sky blue plate. Again, use the white card to cut out clouds and stick it to the other side of the sky blue plate. Now, hold the sea side of the plate, and turn the sky blue plate till it seems as if the dolphin is jumping from among the waves.
16. Paper Plate Easter Bunny Craft
This craft is so simple that kids of all ages will enjoy creating it. When finally it’s made, you can use it to decorate your home at Easter or even use them as masks.
How to make paper plate Easter Bunny craft: Use a sheet of pink construction card paper to cut out large ear shapes for your Easter Bunny. Alternatively, you can ask your kid to cut them out. For smaller ears, use the same paper to cut out smaller shapes. Stick together the ear pieces and then staple them to the paper plate.
To make the face of the Easter Bunny, staple or stick the whiskers on to the plate and then cover them with pink cheeks cut out of pink construction paper. Use a black marker to add a smile to your Bunny’s face or tie a ribbon bow at the base of one of his ears under his chin.
17. Paper Plate Elephant Mask Craft
It will be great fun for your artistic child to decorate an elephant mask of Indian origin in all its grandeur and colourful head-dress.
How to make paper plate elephant mask craft: Turn the paper plate over and paint it grey and allow it to dry. After it dries, cut out eye holes for the elephant. Use grey card paper to cut out a trunk and two ears. Keep the ears small because Indian elephants have small ears. Stick the ears to each side of the face and the trunk to the centre.
Now, cut out a triangle shape of coloured paper for the head-dress and stick it on to the plate so that the point is midway between its eyes. Use coloured paper to decorate the elephant’s head-dress and make a small hole on each side of its face and let a piece of elastic go through. Your mask is ready.
18. Paper Plate May Day Basket Handprint Craft
Using a paper plate concept, little children can create their own basket of flowers, though it may seem like a lot of work for little hands.
How to make paper plate May Day basket handprint craft: Print out two or three copies of flower templates. Colour them as you like and then cut out these shapes. Now, cut out the top half of the paper plate but leave the edge intact. Paint the bottom of the paper plate and its edge. Place a large piece of construction paper on a table and trace the plate onto it. Now, carefully cut out this circular shape.
Stick this piece to the back of the plate so that you create a narrow basket. Stick flowers into this basket, both at the back of the basket and in the front. To make it look natural, put a few candies in the basket or a couple of messages. Trace handprints in various colours on the construction paper and stick them on the edge of the basket to serve as a handprint handle.
19. Paper Plate Flower Wreath Craft
Children can use this craft to practice scissor skills by cutting flowers in circles.
How to make paper plate flower wreath craft: Cut out the centre of the paper plate so that you have a donut shape remaining. This will be the base of your wreath. Now, print out the template pieces depending on how you conceive your wreath to be. Make your flowers as colourful as possible.
Stick your paper flowers so that they completely cover the donut shaped hole. Tie a bow and stick it for extra decoration. Add a piece of yarn at the rear of the basket so that you can hang it.
20. Paper Plate Alien Monster Craft
To make a genuine looking alien monster craft, cut out holes in the paper plate for his eyes.
How to make paper plate alien monster craft: Turn the paper plate over and paint it blue-green. Print out your choice of craft template. Colour the template appropriately and cut out the required template pieces.
Stick the ears, nose and eyes to the plate so that you have the alien monster’s face ready. Now, give him a hat by sticking it on to the top of the plate. Stick two strands of hair on either side of the hat and stick his ears on each side of the plate. On either side of the plate, stick his ears and at the base of the plate, stick his mouth. Above the mouth, stick the nose and above it, the eyes. Above the eyes, stick another eye because monsters have three eyes.
21. Paper Plate Heart Bear Craft
Preschoolers and kindergarten children will love to make this teddy bear just for fun. By cutting out heart shapes, these children can refine their scissor skills.
How to make paper plate heart bear craft: Choose a brown shade to paint the base of your paper plate. Print out a template of a heart and a bear you like. Both templates are necessary. Colour them as necessary. Cut the template pieces.
Stick the bear’s mouth on to the base of the paper plate. Next, stick the heart-shaped nose appropriately. Now, stick the eyes above the nose and the ears on either side of the paper plate. Stick a bowtie between its ears and teddy is ready for your little one.
22. Paper Plate Bumblebee Craft
Here’s a bumblebee that will put a smile on every child’s face.
How to make paper plate bumblebee craft: Paint the paper plate a bright yellow and allow it to dry. Add black stripes on its body, using black paint. Add wiggly eyes, and use markers for a mouth and a pair of legs. Next, cut waxed paper to make two wings and attach them using scotch tape. Cut out a triangular shape of black paper and stick it to the back of the bumblebee for a stinger.
23. Paper Plate Cloud and Rainbow Craft
All children love to spot a rainbow in the sky. So, why not bring a rainbow indoors–something that they can create?
How to make paper plate cloud and rainbow craft: Little kids can get together to make this fun craft using a paper plate, tissue paper and cotton balls. To make the cloud and rainbow craft, halve the paper plate. Stick cotton balls all across the base of the paper plate to serve as a cloud. Cut one-inch strips out of the seven-coloured tissue papers and stick them to the base of the paper plate cloud to match the rainbow’s VIBGYOR colours.
24. Paper Plate Crab Craft
This simple paper plate craft is just right for young kids to make. Though best to make with a paper plate, in the absence of one, you can trace one on a sheet of cardboard and cut it out.
How to make paper plate crab craft: To begin, make eight holes all around the periphery of the plate. Pass pipe cleaners through these eight holes and twist them to remain locked. Place three straw pieces on each side of the pipe cleaners which serve as leg parts. Bend these pipe cleaners so that they seem as if the crab is walking. Punch two more holes near the front of the crab and pass one pipe cleaner through with its sticking upwards. Twist to lock it and add beads to the end of the pipe cleaner as decoration. Colour or paint as desired.
25. Paper Plate Flower Mask Craft
This is a very sweet craft that kids will have a larger role in because they will wear the mask once it’s made.
How to make paper plate flower mask craft: Take a sheet of construction paper, fold it in half and cut out two petals per page. Decorate them with sparkles or markers. Cut out the centre of the paper plate for your kid so that his head can become the flower’s centre. Stick the petals all over the rim of the flower’s centre. Stick a pencil or a popsicle stick as the stalk of the flower. Paint the flower any colour you wish and the stick or stalk green. Now, urge your kid to put his head at the mouth of the flower’s centre and look through it.
26. Paper Plate Frog Puppet Craft
Kids have loads of fun playing with this garden froggie muppet.
How to make paper plate frog puppet craft: Give the plate a green tempera shade of paint and allow it to dry. Choose the craft template you want and print it out. Colour it and cut out the pieces of the template. After the plate has dried, stick the legs of the frog to the bottom half of the plate and to the arms. Fold the plate in half and crease Fold the plate in half and crease them. Stick the eyes on the top of the plate. Stick the tongue inside the mouth part of the frog. Curl the tongue using a pencil so that it looks natural.
27. Paper Plate Panda Craft
It’s really easy for kids to convert a paper plate into a cute little panda.
How to make paper plate panda craft: Use black craft paper to cut out two oval shapes of equal size to make a large black patch near the panda’s eyes. Use the white paper to cut out two small circular shapes for the panda’s eyes.
Form the panda’s nose by cutting a triangular shape with rounded corners. Cut out ears for the panda. Turn the plate on its back so that the panda gets a rounded and chubby look. For this, put the plate upside down and stick everything that you need to on this side. Draw the mouth using a black pen. Put two black dots for the pupils of his eyes and with this your panda is ready and lovable.
28. Paper Plate Sheep Craft
Your toddler knows the nursery rhyme “Mary has a little lamb.” So, it will be easy for him to recreate that lamb on paper, with a little help from you.
How to make paper plate sheep craft: Tell your child to spread glue all over the paper plate. After this is done, ask him to press a lot of shredded paper on to the plate. Do a few of this, sticking shredded paper on a layer of glue till the paper plate begins looking woolly. Now, add more glue to make the face, legs and ears.
Cut out a big oval shape from black craft paper to make the lamb’s head. Cut two small round shapes for the lamb’s eyes and ears too. Another small oval shape helps form the tail and your lamb is ready.
So far, we’ve seen paper plates being used to create animals, flowers, masks and other kind of craft. But how about creating decorations for Christmas using paper plates? Here are some festive ideas you could use:
29. Paper Plate Santa Claus Craft
When it comes to DIY crafts, using paper plates is not just the cheapest but also the easiest medium. This season, try using a paper plate to make an interesting and festive Santa Claus with your kid. With a paper plate and ordinary craft supplies, you can make a good Santa Claus you’ll love to put up.
How to make paper plate Santa Claus craft: Take a paper plate to make Santa’s head. For his nose, crush a sheet of paper or newspaper and form it appropriately. Set the paper plate from the rear up. Stick the nose in the middle of the plate and let it dry.
Use water-based paints to paint the paper plate with any water-based paint. For Santa’s complexion, you can choose to give him skin colouring of your choice. After this paint dries, draw his eyes, nose, cheeks, mouth and chin with crayons. Use red construction paper to cut out a triangular piece for Santa’s hat. Now, stick this hat on to Santa’s head and stick some cotton to line the hat. On the tip of the hat, stick a small cotton ball and then stick some more cotton to give Santa’s thick eyebrows and moustache.
Santa’s beard will need some more cotton, so add that now. To cover his cheeks entirely, take a swathe of cotton and spread it out. When the glue dries all over, hang up your Santa Claus as a wall decor piece.
30. Paper Plate Reindeer Craft
Rudolph the red-nosed reindeer is an inevitable part of the Christmas festivities. So, get ready for the festival with this Christmas decoration.
How to make paper plate reindeer craft: Colour the base of a paper plate using a water-based shade of brown paint. While it dries, trace your child’s hands set on construction paper. Cut along the handprints.
Stick the handprints on the other side of the plate’s top part so that you get a pair of antlers for this paper reindeer. Stick a pair of wiggly eyes and a soft pompom nose. Draw Santa’s mouth using a black crayon or marker. Stick a bow at the reindeer’s chin. Once the glue dries and then hang up your paper plate reindeer as a lovable item of Christmas décor.
31. Paper Plate Christmas Elf Craft
Elves are popular Christmas characters, so it would be fun to make an adorable little elf with your child before the Christmas season. Make one with a paper plate.
How to make paper plate Christmas Elf craft: Choose a skin tone paint and use it to colour the elf’s face and hands by painting the paper plate and a bit of the white cardstock paper. Use your white construction paper to paint elf ears and set these pieces aside until they dry.
Meanwhile, cut out a thin triangle made of green cardstock paper, using the entire stock of green card paper. Fold down the edge of the triangle so that it looks like a Christmas hat. From a sheet of yellow cardstock paper, cut out enough to create elf’s hair.
When the paint dries, cut pointed ears from the painted cardstock paper and stick them on to the sides of your paper plate. Place adhesive on the top of the paper plate and bottom and stick it on the green triangle. At the top of the paper plate, stick the elf hair and then make a line-up of cotton balls at the top end of the hair and one at the base of the hat and stick them. Stick the googly eyes on the elf’s face and add a red circular sticker for a nose. Use a black marker to draw a smile on his face and your elf is ready to welcome everyone to your home at Christmas time.
32. Paper Plate Christmas Tree Craft
This craft gives little ones the opportunity to put into practice the colours and glitter of Christmas onto their own very special tree. So, give it to them and watch how they build it.
How to make paper plate Christmas Tree craft: Paint your paper plate the classic Christmas tree green and leave it to dry. Once dry, cut it into three equal parts, then cut one part a bit smaller. When your paper plate is dry, cut it into thirds, then cut one of the section a bit smaller. Layer them together, ranging from largest to smallest to get a Christmas Tree shape. Punch six holes at the bottom of each of these sections you just cut.
Cut a one-foot selection of ribbon for each paper plate part and pass them through the punched holes. Begin by taking the ribbon from the rear of the paper plate and passing it through the first hole and then through the others. Finish with extra ribbon hanging at the back of the paper plate.
Tape the excess pieces of ribbon to the back of the paper plate to hold them in place. When you are finished lacing all your pieces, use a stapler to staple them together into your Christmas Tree. Finish you Christmas Tree by stapling (or gluing) on a brown tree stump cut out from your brown paper and adding a foam star sticker at the top. Glue on any sequin or embellishments that you would like to decorate your Christmas Tree. Here is my 4-year olds Christmas Tree below. She chose to add sequins and little jewels with a silver star on top. Such a beautiful piece of artwork to display for the holiday!
- Handprint Santa craft
Christmas crafts for kids handprint santaHandprint crafts are always a hit with kids of all ages. My 3-year-old loves tracing his hands on paper and I am sure he will love to do this craft.
This handprint Santa craft by Chelsea Day is mess free and can be used in multiple ways. Check it here in Right Start Blog.
2. CD Christmas tree ornament
Christmas crafts for kids christmas ornament DIYTake out those old CDs from your shelf and turn them into adorable Christmas tree ornaments. This brilliant Christmas tree craft uses puffy paints and First Palatte has even given another simpler version of this same craft suitable for younger kids.
3. Pinwheel pasta Christmas tree craft
Christmas crafts for kids xmas treeA cute Christmas tree with colored pasta is an innovative idea and I pretty much liked it, as it is different from what we see usually. This is a little messy craft but what’s fun without a little mess. I would recommend this craft for school going kids. Give it a try. Detailed steps are here.
Craft stick Christmas tree ornament
Christmas crafts for kids DIY christmas ornamentThe artsy-crafty Grandma Tracy from This Grandma Is Fun gives an easy and cheap way to decorate your Christmas tree with cute tree ornaments made from craft-sticks, buttons, glitter and paint.


